Excel to CSV Date Format Guide
Quick Setup for Correct Date Export
Different Excel language settings can cause dates to export in formats like DD/MM/YYYY or
MM/DD/YYYY, which may be misinterpreted. To ensure 100% accuracy when uploading to the PFIC
Calculator, follow these 4 steps to standardize your dates to the international YYYY-MM-DD
format.
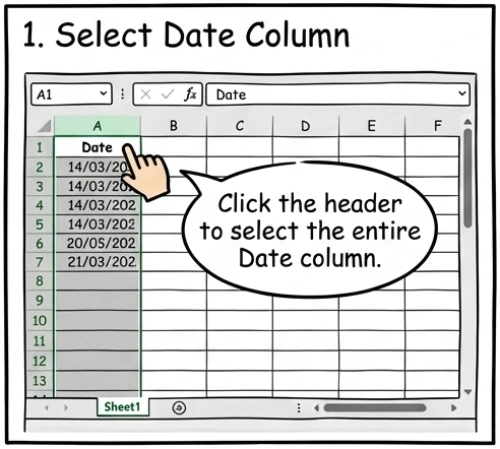
Step 1: Select the Date Column
Click the column letter (e.g., Column A) at the very top of your Excel sheet.
This selects the entire column, ensuring that every singe transaction row gets formatted correctly.
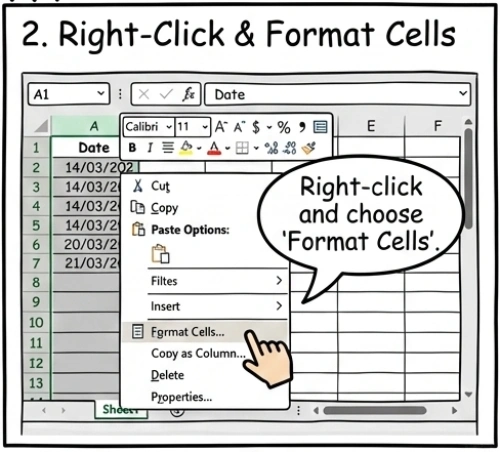
Step 2: Right-click and Format Cells
With the column still selected, right-click anywhere on the highlighted area.
From the context menu that appears, choose Format Cells....
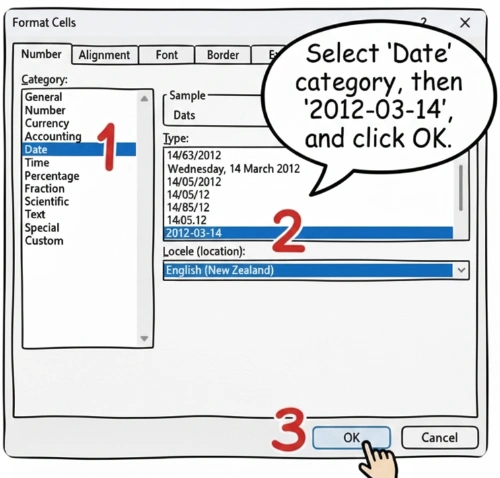
Step 3: Choose ISO Date Format (2012-03-14)
In the Format Cells window:
- Select Date from the Category list on the left.
- In the Type list on the right, scroll to find 2012-03-14 (YYYY-MM-DD).
- Click OK.
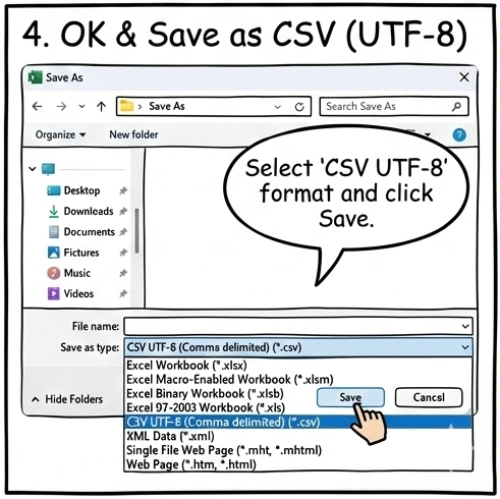
Step 4: Save as CSV (UTF-8)
Now that your dates are visually formatted as YYYY-MM-DD, go to File > Save As.
In the file type dropdown, select CSV UTF-8 (Comma delimited) (*.csv).
This ensures that the saved file contains standard dates and supports all character sets.